Manage k8s resources using controllers. Part 2
Hi everyone! I'm back and I want to share some great news - Part 2 of the article series about k8s resource operators is now written and you'll start reading it in a few seconds. For those who landed directly on Part 2, I suggest you check out the first part, where, by the way, there's my plan that I'm trying to follow 😄
I want to mention that I didn't choose this topic by chance. Of course, it's related to my work, but really, it's about something more than just development. Over the last year, Platform Engineering has been gaining popularity, which involves designing and developing internal company systems for quick management of project infrastructure in clouds without extensive DevOps knowledge (Internal Developer Platform).
I believe that in 2-3 years, the market will need such narrowly-focused specialists, so take a closer look at this direction.
Introduction
In Part 1, we explored the theoretical aspects of working with Kubernetes operators and understood their importance in modern development. Now it's time to move on to the practical part and create our own operator using Operator SDK and the Go programming language. Let's go through the development process step by step, from setting up the development environment to the final deployment of our operator into the cluster. We won't focus too much on secondary actions. I expect you to have some background in Go and practical development in general.
We'll pay special attention to creating a Custom Resource Definition (CRD) and implementing a controller that will monitor and respond to changes in our custom resources. During development, we'll look at the main patterns and best practices used in creating operators. We'll also examine in detail the project structure and core components necessary for successful operator functioning. We'll learn how to properly handle cluster events and respond to them accordingly.
We'll separately cover testing our operator and debugging its operation in Part 3 of this series.
An important aspect will be reviewing error handling mechanisms and recovery after failures. Finally, we'll discuss possible use cases for the created operator and prospects for its further development. The entire process will be accompanied by practical examples and detailed explanations. This hands-on experience will help you better understand the internal workings of Kubernetes operators and prepare you for creating your own solutions for automating resource management in the cluster.
Source code
All code related to the practical part can be found on our Github:
https://github.com/uagolang/k8s-operator
So, let's finally try all this in practice. First, let's define the tasks that we need to solve using the CRD controller.
Example: Automating Valkey (Open-Source Redis) Management in Kubernetes
You might not know, but Redis has become paid. Valkey is its open-source alternative.
Problem
In many companies, developers face the challenge of manually configuring infrastructure when deploying new development or testing environments. Let's imagine we work in such a company and we've been tasked with automating this process. Based on our task, the following problems typically arise:
- Manual creation and configuration of service instances
- Security and access parameters setup
- Compute resources configuration
- High probability of human error during manual setup
- Significant time spent on repetitive operations
- Difficulty in maintaining consistent configuration across environments
- Lack of automated recovery after failures
That's why automating this process using a Kubernetes operator is critically important for modern DevOps practices and future Platform Engineers.
Task Definition
We'll break down the operator development into the following stages:
- Project setup using
Operator SDK:- Project initialization
- API types creation
- CRD manifests generation & apply
- Controller implementation:
- Resource creation logic development
- State monitoring mechanisms implementation
- Failure recovery logic implementation
Getting Started
To start working on our operator, we need to prepare the development environment. Make sure you have the following components installed:
- Go (version 1.24 or higher)
- Docker
- kubectl
- minikube (to run k8s cluster locally)
- Operator SDK (latest stable version)
- MacOS:
brew install operator-sdk
- MacOS:
Before we start developing the operator, let's understand what minikube is and set it up.
What is Minikube?
Minikube is a tool that lets you run Kubernetes locally. It creates a virtual machine (VM) on your computer and deploys a simple cluster consisting of a single node.
Minikube solves the following problems:
- Local development and testing of Kubernetes applications
- Learning and experimenting with Kubernetes
- Quick deployment of local environment
Setting Up and Running Minikube
Let's look at the basic commands we need:
minikube start # start local cluster
minikube status # check cluster status
minikube stop # stop local cluster
minikube delete # delete local cluster
minikube dashboard # access local cluster dashboard
minikube pause # pause local cluster
minikube unpause # resume after pause
Okay, let's try to start the local cluster:
minikube start- Execution result
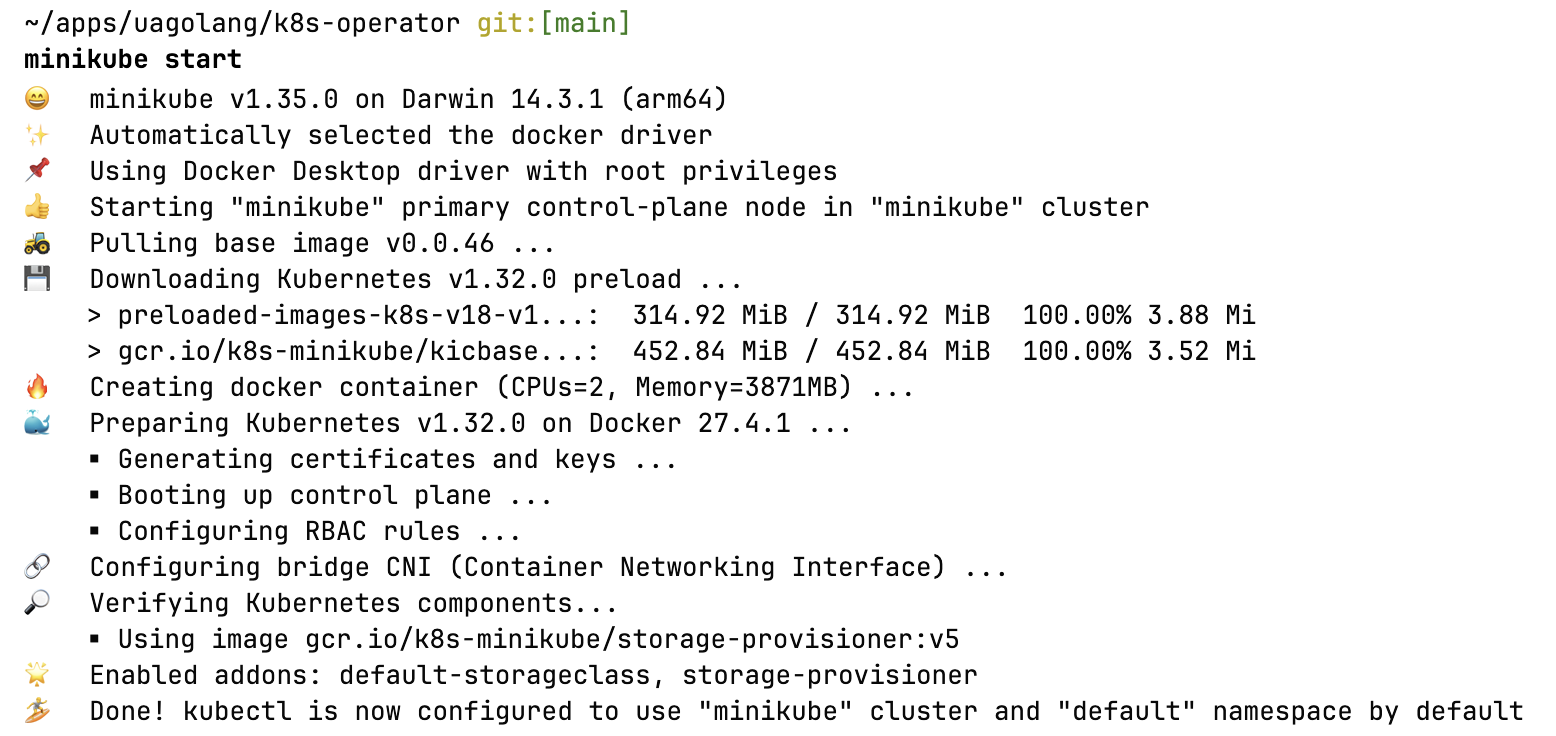
start minikube command output
You can check the status using minikube status:
minikube status

minikube
type: Control Plane
host: Running
kubelet: Running
apiserver: Running
kubeconfig: Configured
Now we need to verify that kubectl knows about minikube by executing the command:
kubectl config get-contexts- Execution result

List of contexts (connections to k8s clusters) with the selected one. To select a context (if minikube is not selected), run the command:
kubectl config use-context minikubeWe can verify that kubectl has access to the cluster
kubectl get namespaces- Execution result
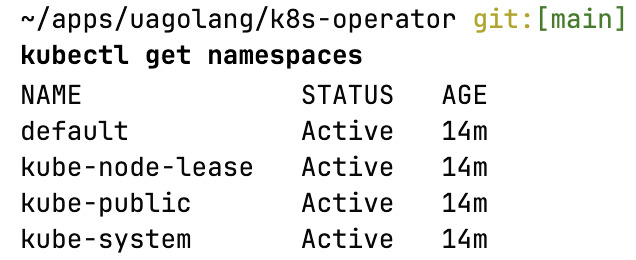
Cluster namespaces list - all is okay!
Now my local Kubernetes cluster is ready for work. And I will use it for developing and testing the operator from our task.
Project Initialization
Let's finally open our IDE and create a new project using the Operator SDK. At this point, you should be in your project folder:
operator-sdk init --domain kuberly.io --repo github.com/uagolang/k8s-operatorThis command will create a basic project structure with all necessary files and dependencies.
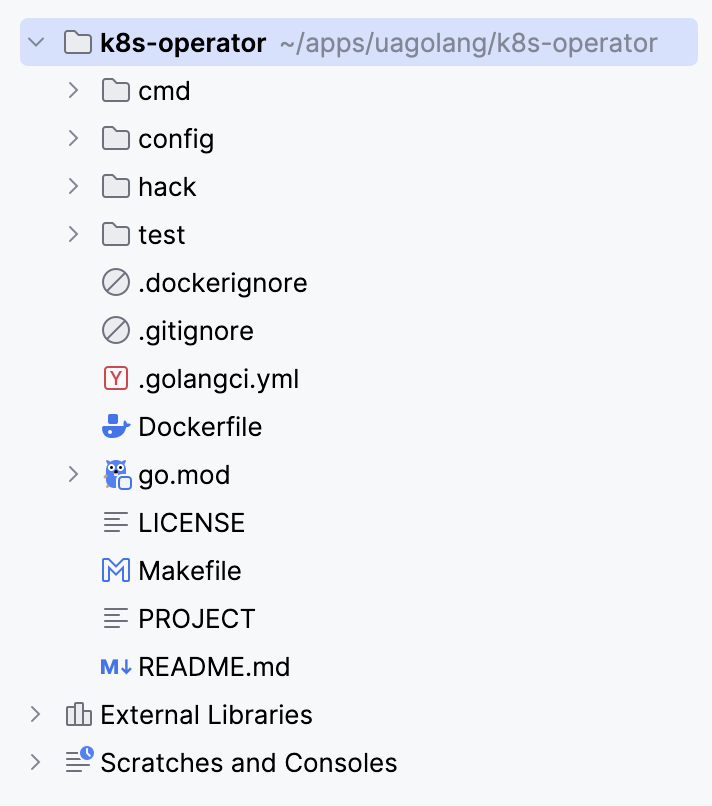
Project structure from Operator SDK
The next step is to add a new API to the k8s cluster so we can manage resources through it. Let's execute the command:
operator-sdk create api --group database --version v1alpha1 --kind Valkey --resource --controllerDon't forget to run go mod tidy to ensure all necessary packages are downloaded and up to date.
I'm interested in the file api/v1alpha1/valkey_types.go. This is where the structures corresponding to certain CRD (Custom Resource Definition) are described. However, these are just types, templates that need to be given certain properties and business logic.
I'll verify that my minikube doesn't yet have the CRD Valkey in the kuberly.io domain:
kubectl get customresourcedefinitions- Execution result
 No CRDs found - all is okay!
Makefile
After initialization, there should be a Makefile in the root project folder. It contains many interesting commands, but let's look at the main ones that significantly simplify our work:
# generates yaml for resource to apply in k8s
make manifests

# adds CRD to k8s cluster
make install

# removes CRD from k8s cluster
make uninstall

# deploys operator to cluster
# operator settings in config/manager/manager.yaml
# and its launch if number of pods > 0 in settings
make deploy

# undeploys operator from k8s cluster
make undeploy

# builds docker image
make docker-build

# uploads docker image to Container Registry
make docker-push
We'll discuss operator deployment to the cluster in details later.
Project folders we're interested in:
api/v1alpha1- generated resource structurescmd/main.go- entry pointconfig/manager- operator settingsinternal/controller- resource controllers and their tests
CRD Controller
Creating a new Kubernetes API through Operator SDK generated, among other things, a resource controller that can be found in internal/controller/valkey_controller.go
I have already prepared the controller code on Github. But at this point, I would like to pause and make you understand what is happening. Let's look at the controller code:
package controller

import (
	"context"
	"time"

	k8serrors "k8s.io/apimachinery/pkg/api/errors"
	metav1 "k8s.io/apimachinery/pkg/apis/meta/v1"
	"k8s.io/apimachinery/pkg/runtime"
	ctrl "sigs.k8s.io/controller-runtime"
	"sigs.k8s.io/controller-runtime/pkg/client"
	"sigs.k8s.io/controller-runtime/pkg/reconcile"

	databasev1alpha1 "github.com/uagolang/k8s-operator/api/v1alpha1"
	"github.com/uagolang/k8s-operator/internal/controller/flows"
	"github.com/uagolang/k8s-operator/internal/controller/flows/valkey"
	"github.com/uagolang/k8s-operator/internal/utils"
)

// ValkeyReconciler reconciles a Valkey object
type ValkeyReconciler struct {
	client.Client
	Scheme *runtime.Scheme
	Flow   flows.Flow
}

//+kubebuilder:rbac:groups=database.kuberly.io,resources=valkeys,verbs=get;list;watch;create;update;patch;delete
//+kubebuilder:rbac:groups=database.kuberly.io,resources=valkeys/status,verbs=get;update;patch
//+kubebuilder:rbac:groups=database.kuberly.io,resources=valkeys/finalizers,verbs=update
//+kubebuilder:rbac:groups=v1,resources=*,verbs=*

// Reconcile is part of the main kubernetes reconciliation loop which aims to
// move the current state of the cluster closer to the desired state.
//
// For more details, check Reconcile and its Result here:
// - https://pkg.go.dev/sigs.k8s.io/controller-runtime@v0.17.3/pkg/reconcile
func (r *ValkeyReconciler) Reconcile(ctx context.Context, req ctrl.Request) (ctrl.Result, error) {
	var emptyResp ctrl.Result
	requeueRes := ctrl.Result{RequeueAfter: 10 * time.Second}

	item := new(databasev1alpha1.Valkey)
	if err := r.Get(ctx, req.NamespacedName, item); err != nil {
		if k8serrors.IsNotFound(err) {
			return emptyResp, reconcile.TerminalError(err)
		} else {
			return emptyResp, err
		}
	}

	statusItem, finalizers, err := r.Flow.Run(ctx, *item)
	status, ok := statusItem.(*databasev1alpha1.ValkeyStatus)
	if !ok {
		return emptyResp, flows.ErrInvalidOutputType
	}
	if err != nil {
		status = &databasev1alpha1.ValkeyStatus{
			Status:          valkeyflow.StatusFailed,
			LastReconcileAt: utils.Pointer(metav1.Now()),
			Error:           err.Error(),
		}
	}

	shouldUpdateFinalizers := !utils.SlicesEqualSorted(item.Finalizers, finalizers)
	if err == nil && shouldUpdateFinalizers {
		item.Finalizers = finalizers
		if err = r.Update(ctx, item); err != nil {
			if k8serrors.IsNotFound(err) {
				return emptyResp, reconcile.TerminalError(err)
			}

			return emptyResp, err
		}

		return emptyResp, nil
	}

	changed := item.Status.IsChanged(status)
	if !changed {
		return requeueRes, nil
	}

	item.Status = *status
	item.Status.LastReconcileAt = utils.Pointer(metav1.Now())
	err = r.Status().Update(ctx, item)
	if err != nil {
		if k8serrors.IsNotFound(err) {
			return emptyResp, reconcile.TerminalError(err)
		}

		return emptyResp, err
	}

	return emptyResp, nil
}

// SetupWithManager sets up the controller with the Manager.
func (r *ValkeyReconciler) SetupWithManager(mgr ctrl.Manager) error {
	return ctrl.NewControllerManagedBy(mgr).
		For(&databasev1alpha1.Valkey{}).
		Complete(r)
}
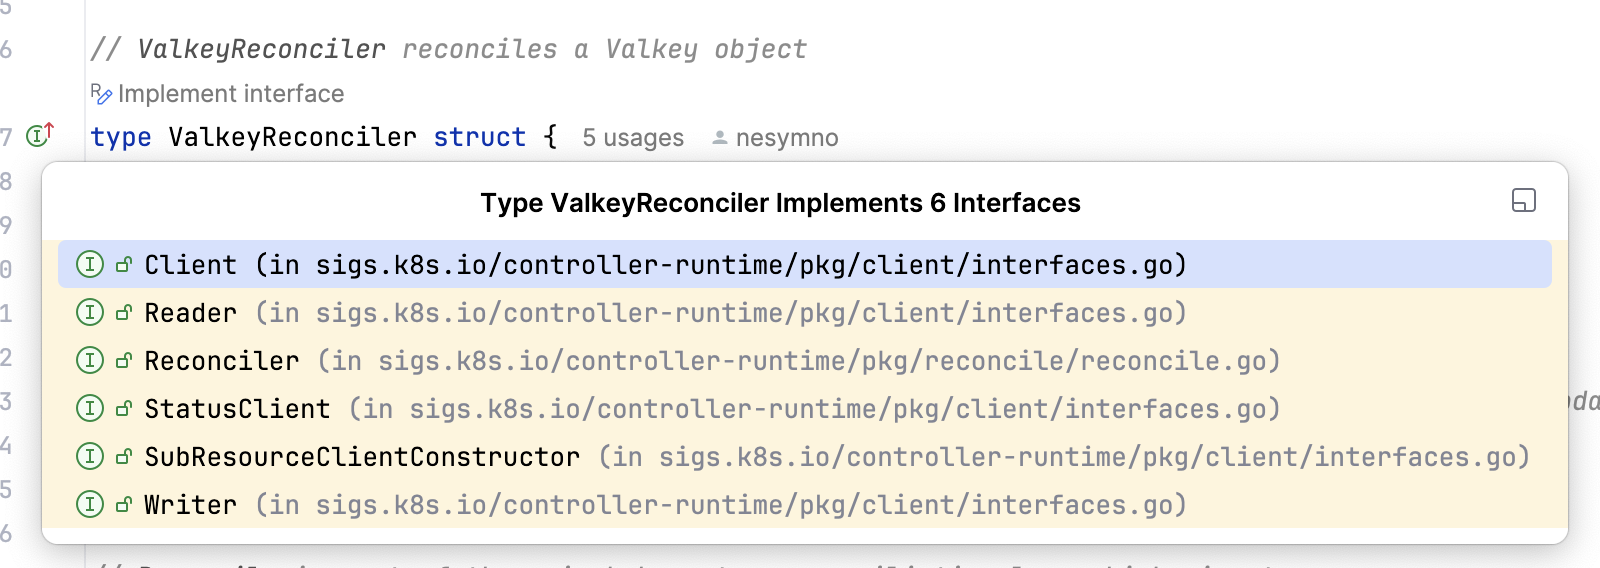
The ValkeyReconciler structure is the controller itself, implementing 6 interfaces from the controller-runtime package by the Kubernetes team.

Interfaces that implements ValkeyReconciler
Next in the file comes the implementation of the Reconcile method, which in turn is an implementation of the Reconciler interface. This is where we will monitor and, if necessary, make changes to our service. The first thing we need to do is initialize the return variables, and they differ from each other, as seen in the code example:
// reconcile cycle will end until the next CRD change
var emptyResp ctrl.Result
// reconcile cycle will run every 10 seconds
requeueRes := ctrl.Result{RequeueAfter: 10 * time.Second}
If it's difficult and unclear, I promise - everything will fall into place soon!
The next step through the k8s controller-runtime (this is important) client is to try to get our CRD:
item := new(databasev1alpha1.Valkey)
if err := r.Get(ctx, req.NamespacedName, item); err != nil {
	// NotFound error means the resource was not found
	if k8serrors.IsNotFound(err) {
		// terminal error returned in this case means
		// that the cycle doesn't need to be restarted - the error will be logged
		// and the reconcile cycle execution for this object ends here
		// since it no longer exists
		return emptyResp, reconcile.TerminalError(err)
	} else {
		return emptyResp, err
	}
}
Okay! Let's continue:
var status := new(databasev1alpha1.ValkeyStatus)
statusItem, finalizers, err := r.Flow.Run(ctx, *item)
if err == nil {
	var ok bool
	status, ok = statusItem.(*databasev1alpha1.ValkeyStatus)
	if !ok {
		return emptyResp, flows.ErrInvalidOutputType
	}
} else {
	status = &databasev1alpha1.ValkeyStatus{
		Status:          valkeyflow.StatusFailed,
		LastReconcileAt: utils.Pointer(metav1.Now()),
		Error:           err.Error(),
	}
}
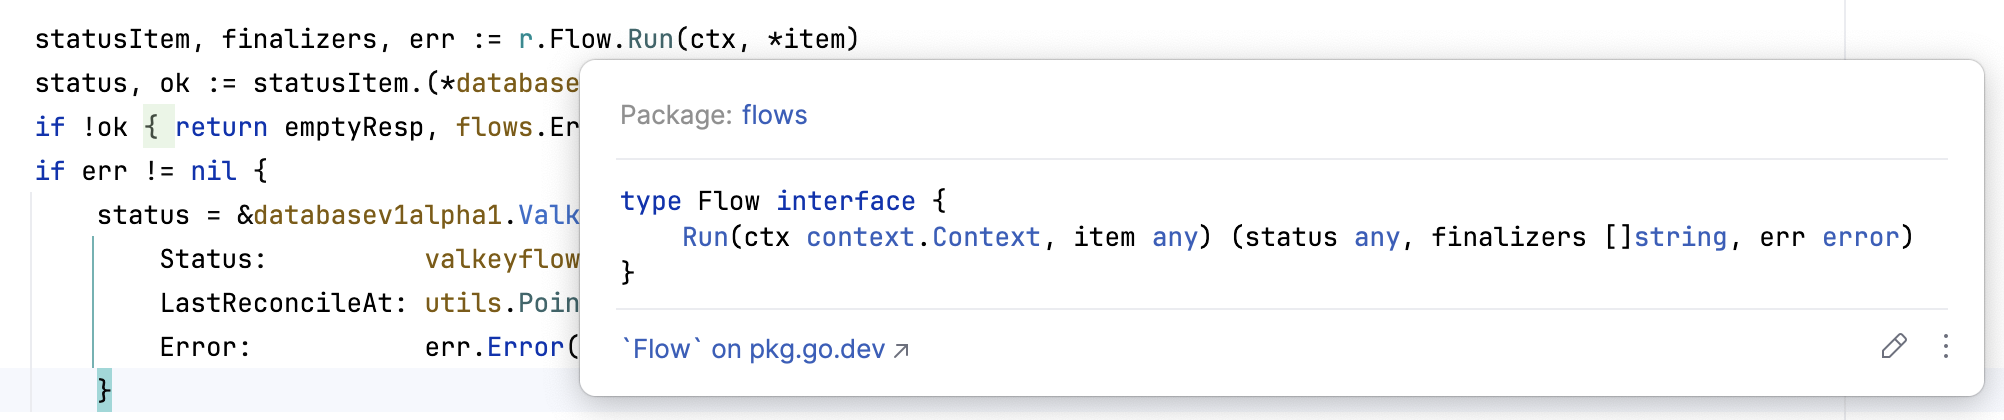
This piece of code is perhaps the most important here because it's responsible for bringing the object to the desired state. This is where the developer can be creative! The Flow attribute is an interface that has only one method Run. This method returns the Status construction of the k8s object, finalizers, or an error.
Flow interface that is an entry point to business logic
Then everything is simple - we check that the received status matches the expected type, otherwise - we return an error. In case when the status is fine, but an error still occurred during flow execution - I change the status to Failed and write the error directly to the CRD so it can be quickly found in Lens or similar programs.
Columns of CRD showing in Lens (or similar GUI)
shouldUpdateFinalizers := !utils.SlicesEqualSorted(item.Finalizers, finalizers)
if err == nil && shouldUpdateFinalizers {
	item.Finalizers = finalizers
	// update the object
	if err = r.Update(ctx, item); err != nil {
		if k8serrors.IsNotFound(err) {
			// will completely end the cycle for this object
			return emptyResp, reconcile.TerminalError(err)
		}

		// error - restart the cycle immediately
		return emptyResp, err
	}

	// end cycle until next update
	// but it occurred during Update
	// cycle will continue work with another case
	return emptyResp, nil
}
In this block, we need to check that there was no error and that there are finalizers that need to be updated. The helper function utils.SlicesEqualSorted can be found in the file internal/utils/utils.go. Essentially, everything is done by the slices package - 2 slices are sorted and checked for value correspondence. If the Update didn't pass because the object no longer exists, then the logic is the same as I described above. But here a regular error is also returned - in this case, the cycle will be restarted immediately, but with an Exponential Backoff strategy for recovery in case of repeated errors.
changed := item.Status.IsChanged(status)
// if nothing changed in the status
// exit, but with restart after 10 seconds
// i.e., monitoring that the resource is in the desired state
if !changed {
	return requeueRes, nil
}

item.Status = *status
item.Status.LastReconcileAt = utils.Pointer(metav1.Now())

// here the situation is similar regarding return
err = r.Status().Update(ctx, item)
if err != nil {
	if k8serrors.IsNotFound(err) {
		return emptyResp, reconcile.TerminalError(err)
	}

	return emptyResp, err
}

return emptyResp, nil
The SetupWithManager method configures the controller with the operator, indicating that it is responsible for resources of type Valkey.
Testing the Resource Controller
As I mentioned in the first article of the series, we will cover testing in the next article, so we won't stop on testing nuances at all right now.
Flow Implementation
To create this resource, open the file api/v1alpha1/valkey_types.go and let's look in detail at our task requirements. I would like the resource to have certain settings that will be used during deployment:
- Docker Image
- Number of replicas
- Persistent storage
- Resource allocation for operation
To do this, let's look at the API type file:
package v1alpha1

import (
	metav1 "k8s.io/apimachinery/pkg/apis/meta/v1"
)

// ValkeySpec defines the desired state of Valkey
type ValkeySpec struct {
	// INSERT ADDITIONAL SPEC FIELDS - desired state of cluster
	// Important: Run "make" to regenerate code after modifying this file

	// Image of Valkey to deploy
	// +kubebuilder:validation:Required
	Image string `json:"image"`

	// Replicas count
	// +kubebuilder:validation:Minimum=0
	// +kubebuilder:validation:Maximum=5
	Replicas int32 `json:"replicas"`

	// User that will be admin
	// +kubebuilder:validation:Required
	User string `json:"user"`

	// Password for admin
	// +kubebuilder:validation:Required
	Password string `json:"password"`

	// UsePersistentVolume for Valkey
	// +kubebuilder:validation:Required
	Volume Volume `json:"volume"`

	// Resource requirements
	// +kubebuilder:validation:Required
	Resource Resource `json:"resource"`
}

type Volume struct {
	// Enabled means that persistent storage should be added
	Enabled bool `json:"enabled"`

	// Storage requirements (e.g., "200Mi", "1Gi", "10Gi", "1Ti")
	// +kubebuilder:validation:Pattern=^[0-9]+[MGT]i$
	Storage string `json:"storage"`
}

type Resource struct {
	// Memory requirements (e.g., "512Mi", "1Gi")
	// +kubebuilder:validation:Required
	// +kubebuilder:validation:Pattern=^[0-9]+[KMG]i$
	Memory string `json:"memory"`

	// CPU requirements (e.g., "100m", "1", "2.5")
	// +kubebuilder:validation:Required
	// +kubebuilder:validation:Pattern=^[0-9]+m?$
	CPU string `json:"cpu"`

	// Storage requirements (e.g., "200Mi", "1Gi", "10Gi", "1Ti")
	// +kubebuilder:validation:Required
	// +kubebuilder:validation:Pattern=^[0-9]+[MGT]i$
	Storage string `json:"storage"`
}

// ValkeyStatus defines the observed state of Valkey
type ValkeyStatus struct {
	// INSERT ADDITIONAL STATUS FIELD - define observed state of cluster
	// Important: Run "make" to regenerate code after modifying this file

	// Status could be 'running', 'failed', 'stopped'
	Status string `json:"status,omitempty"`
	// Error will be filled if some occurs
	Error string `json:"error,omitempty"`
	// ReadyReplicas is a number of working replicas
	ReadyReplicas int32 `json:"ready_replicas"`
	// LastReconcileAt contains timestamp of the last reconcile
	// only if something was changed
	LastReconcileAt *metav1.Time `json:"last_reconcile_at,omitempty"`
}

func (s *ValkeyStatus) IsChanged(new *ValkeyStatus) bool {
	if s.Error != new.Error {
		return true
	}
	if s.ReadyReplicas != new.ReadyReplicas {
		return true
	}
	if s.Status != new.Status {
		return true
	}

	return false
}

//+kubebuilder:object:root=true
//+kubebuilder:subresource:status
//+kubebuilder:printcolumn:name="Image",type="string",JSONPath=".spec.image"
//+kubebuilder:printcolumn:name="CPU",type="string",JSONPath=".spec.resource.cpu"
//+kubebuilder:printcolumn:name="Memory",type="string",JSONPath=".spec.resource.memory"
//+kubebuilder:printcolumn:name="Status",type="string",JSONPath=".status.status"
//+kubebuilder:printcolumn:name="Error",type="string",JSONPath=".status.error"
//+kubebuilder:printcolumn:name="Has volume",type="boolean",JSONPath=".spec.volume.enabled"
//+kubebuilder:printcolumn:name="Volume size",type="string",JSONPath=".spec.volume.storage"
//+kubebuilder:printcolumn:name="Replicas",type="integer",JSONPath=".spec.replicas"
//+kubebuilder:printcolumn:name="Ready replicas",type="integer",JSONPath=".status.ready_replicas"
//+kubebuilder:printcolumn:name="Last reconcile",type="date",JSONPath=".status.last_reconcile_at"

// Valkey is the Schema for the valkeys API
type Valkey struct {
	metav1.TypeMeta   `json:",inline"`
	metav1.ObjectMeta `json:"metadata,omitempty"`

	Spec   ValkeySpec   `json:"spec,omitempty"`
	Status ValkeyStatus `json:"status,omitempty"`
}

//+kubebuilder:object:root=true

// ValkeyList contains a list of Valkey
type ValkeyList struct {
	metav1.TypeMeta `json:",inline"`
	metav1.ListMeta `json:"metadata,omitempty"`
	Items           []Valkey `json:"items"`
}

func init() {
	SchemeBuilder.Register(&Valkey{}, &ValkeyList{})
}
It's worth paying attention to another annotation:
//+kubebuilder:printcolumn:name="Image",type="string",JSONPath=".spec.image"
//+kubebuilder:printcolumn:name="CPU",type="string",JSONPath=".spec.resource.cpu"
//+kubebuilder:printcolumn:name="Memory",type="string",JSONPath=".spec.resource.memory"
//+kubebuilder:printcolumn:name="Status",type="string",JSONPath=".status.status"
//+kubebuilder:printcolumn:name="Error",type="string",JSONPath=".status.error"
//+kubebuilder:printcolumn:name="Has volume",type="boolean",JSONPath=".spec.volume.enabled"
//+kubebuilder:printcolumn:name="Volume size",type="string",JSONPath=".spec.volume.storage"
//+kubebuilder:printcolumn:name="Replicas",type="integer",JSONPath=".spec.replicas"
//+kubebuilder:printcolumn:name="Ready replicas",type="integer",JSONPath=".status.ready_replicas"
//+kubebuilder:printcolumn:name="Last reconcile",type="date",JSONPath=".status.last_reconcile_at"
It allows setting columns for display in GUI, for example Lens.
Next, we need to "load" the created API into the cluster as a CRD:
make generate
make manifests
make install
kubectl get customresourcedefinitions
Let's verify that the CRD was added to the cluster:

Valkey CRD exists
If we look in Lens (or something similar, like k9s), specifically in the list of resources of this CRD, we can see the columns that we specified in the annotation.

Valkey CRD columns in GUI
It's very convenient to have important parameters right in front of you. I also consider it good practice to have an Error attribute in the object's status in case of an error, so you don't have to search for it in the logs.
So, I added to the object's Spec the parameters that I wanted to control:
// ValkeySpec defines the desired state of Valkey
type ValkeySpec struct {
	// INSERT ADDITIONAL SPEC FIELDS - desired state of cluster
	// Important: Run "make" to regenerate code after modifying this file

	// Image of Valkey to deploy
	// +kubebuilder:validation:Required
	Image string `json:"image"`

	// Replicas count
	// +kubebuilder:validation:Minimum=0
	// +kubebuilder:validation:Maximum=5
	Replicas int32 `json:"replicas"`

	// User that will be admin
	// +kubebuilder:validation:Required
	User string `json:"user"`

	// Password for admin
	// +kubebuilder:validation:Required
	Password string `json:"password"`

	// UsePersistentVolume for Valkey
	// +kubebuilder:validation:Required
	Volume Volume `json:"volume"`

	// Resource requirements
	// +kubebuilder:validation:Required
	Resource Resource `json:"resource"`
}
Isn't it beautiful? A rhetorical question!
Let's move on to the next step - the Flow interface and its Run method, which should cover all the cases we expect:
func (r *FlowImpl) Run(ctx context.Context, input any) (any, []string, error) {
	item, ok := input.(v1alpha1.Valkey)
	if !ok {
		return nil, nil, flows.ErrInvalidInputType
	}

	// get logger from context and add data
	logger := log.FromContext(ctx).WithValues("flow", "valkey", "crd_name", item.Name)
	// write logger back to context
	log.IntoContext(ctx, logger)

	res := new(v1alpha1.ValkeyStatus)

	// if object has DeletionTimestamp attribute filled
	// then delete all resources created by CRD
	if !item.DeletionTimestamp.IsZero() { // should be deleted
		return r.delete(ctx, &item)
	}

	// finalizers block deletion until they are removed
	// they are necessary to "fix" the execution of certain business logic cases
	// don't confuse with mutex, this is completely different
	if len(item.Finalizers) == 0 { // save finalizers
		var err error
		logger.Info("finalizer was added to valkey")

		// call Create method in service
		// that works with required CRD resources
		_, err = r.valkeySvc.Create(ctx, &valkey.CreateRequest{
			CrdName:   item.Name,
			Namespace: item.Namespace,
			Image:     item.Spec.Image,
			User:      item.Spec.User,
			Password:  item.Spec.Password,
			Replicas:  item.Spec.Replicas,
			Volume:    item.Spec.Volume,
			Resource:  item.Spec.Resource,
		})
		if err != nil {
			return nil, nil, err
		}

		// change status to In Progress
		res.Status = StatusInProgress

		// return ValkeyStatus and finalizer
		return res, []string{Finalizer}, nil
	}

	// if finalizer is already in object, update resources
	err := r.valkeySvc.Update(ctx, &valkey.UpdateRequest{
		CrdName:   item.Name,
		Namespace: item.Namespace,
		Image:     &item.Spec.Image,
		User:      &item.Spec.User,
		Password:  &item.Spec.Password,
		Replicas:  &item.Spec.Replicas,
		Volume:    &item.Spec.Volume,
		Resource:  &item.Spec.Resource,
	})
	if err != nil {
		return nil, nil, err
	}

	// check if pods are up
	ready, readyReplicas, err := r.valkeySvc.IsReady(ctx, &item)
	if err != nil {
		return nil, nil, err
	}
	// if no error but pods are not up
	// consider Valkey stopped and exit
	if !ready || readyReplicas == 0 {
		res.Status = StatusStopped
		return res, []string{}, nil
	}

	// update status that everything is working
	res.ReadyReplicas = readyReplicas
	res.Status = StatusRunning

	return res, item.Finalizers, nil
}
What is this valkeySvc? It's another layer of abstraction, also a service that implements the given interface. I consider this good practice as it isolates certain parts of work and enables easier testing.
// service for managing resources required
// for valkey functionality
type Service interface {
	Create(ctx context.Context, i *CreateRequest) (*v1alpha1.Valkey, error)
	Update(ctx context.Context, i *UpdateRequest) error
	IsReady(ctx context.Context, item *v1alpha1.Valkey) (bool, int32, error)
	Delete(ctx context.Context, i types.NamespacedName) error
}
Resources that need to be created for each valkey:
- Secret - for storing admin user passwords and other sensitive data
- PersistentVolumeClaims - permanent storage
- Deployment - specify Image and spin up containers in pods
- Service - inter-service communication in the network
The implementation of this interface is located here. If you look at it carefully, you can see how we create/update/delete the necessary k8s resources using parameters.
Another important component (maybe not directly in this example, but) is the ability to wait until some resource is actually created and starts functioning. An example of waiting can be found in valkeyService:
func (s *valkeyService) waitForSecret(name, namespace string, dur time.Duration) error {
	// initialize new context with timeout
	ctx, cancel := context.WithTimeout(context.Background(), dur)
	defer cancel()

	// loop until timeout with given interval
	return wait.PollUntilContextTimeout(ctx, pollInterval, dur, false, func(ctx context.Context) (bool, error) {
		// attempt to get secret
		_, err := s.getSecret(ctx, types.NamespacedName{
			Name:      name,
			Namespace: namespace,
		})
		// secret already exists - all good
		if err == nil {
			return true, nil
		}
		// if secret not found - try again
		if k8serrors.IsNotFound(err) {
			return false, nil
		}

		// if error - return it
		return false, err
	})
}
Adding a new Valkey
Since I don't like writing yaml files manually, I decided to write a CLI tool that makes it easy to add new Valkey CRDs. For this, I used a popular Go library - cobra. I don't want to dwell on the implementation details of this CLI - it's not related to the topic. But now you can simply add a new Valkey to the k8s cluster:
go run cmd/cli/main.go valkey create --name=test --namespace=test --image=valkey/valkey --user=root --pass=root --replicas=1 --volume_enabled=true --cpu=200m --memory=512Mi --storage=512MiAfter checking Lens, I saw that everything worked:

New Valkey created by command above
I'll try to run the operator with the command go run cmd/main.go:

The result of successfully bringing the object to the desired state
I verify that the pods are up and try to connect using valkey-cli through the container terminal:

Active Valkey pod
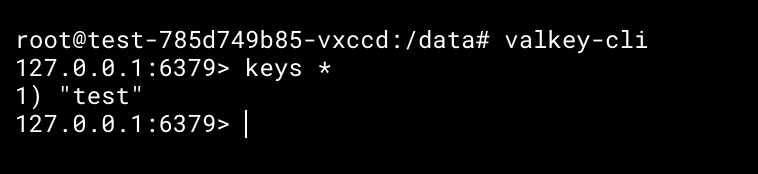
Using valkey-cli to manage internal state
This test key I added earlier, your execution result should be empty.
Basically, you can take the repository code and play around with different parameters by yourself.
Deploying the operator to the cluster
To deploy the operator to the cluster, you need to execute the following commands:
make generate
make manifests
make docker-build
docker login
make docker-push
make deploy
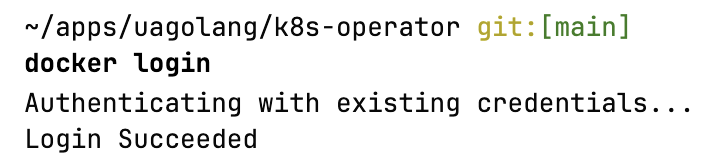
To push a new image to Container Registry (Docker Hub by default), you need to authenticate with Docker Hub first:
# if you're authenticated in Docker Engine
# then everything should be pretty easy
docker login # authenticate in docker hub
Executing make docker-build:

Result of docker login
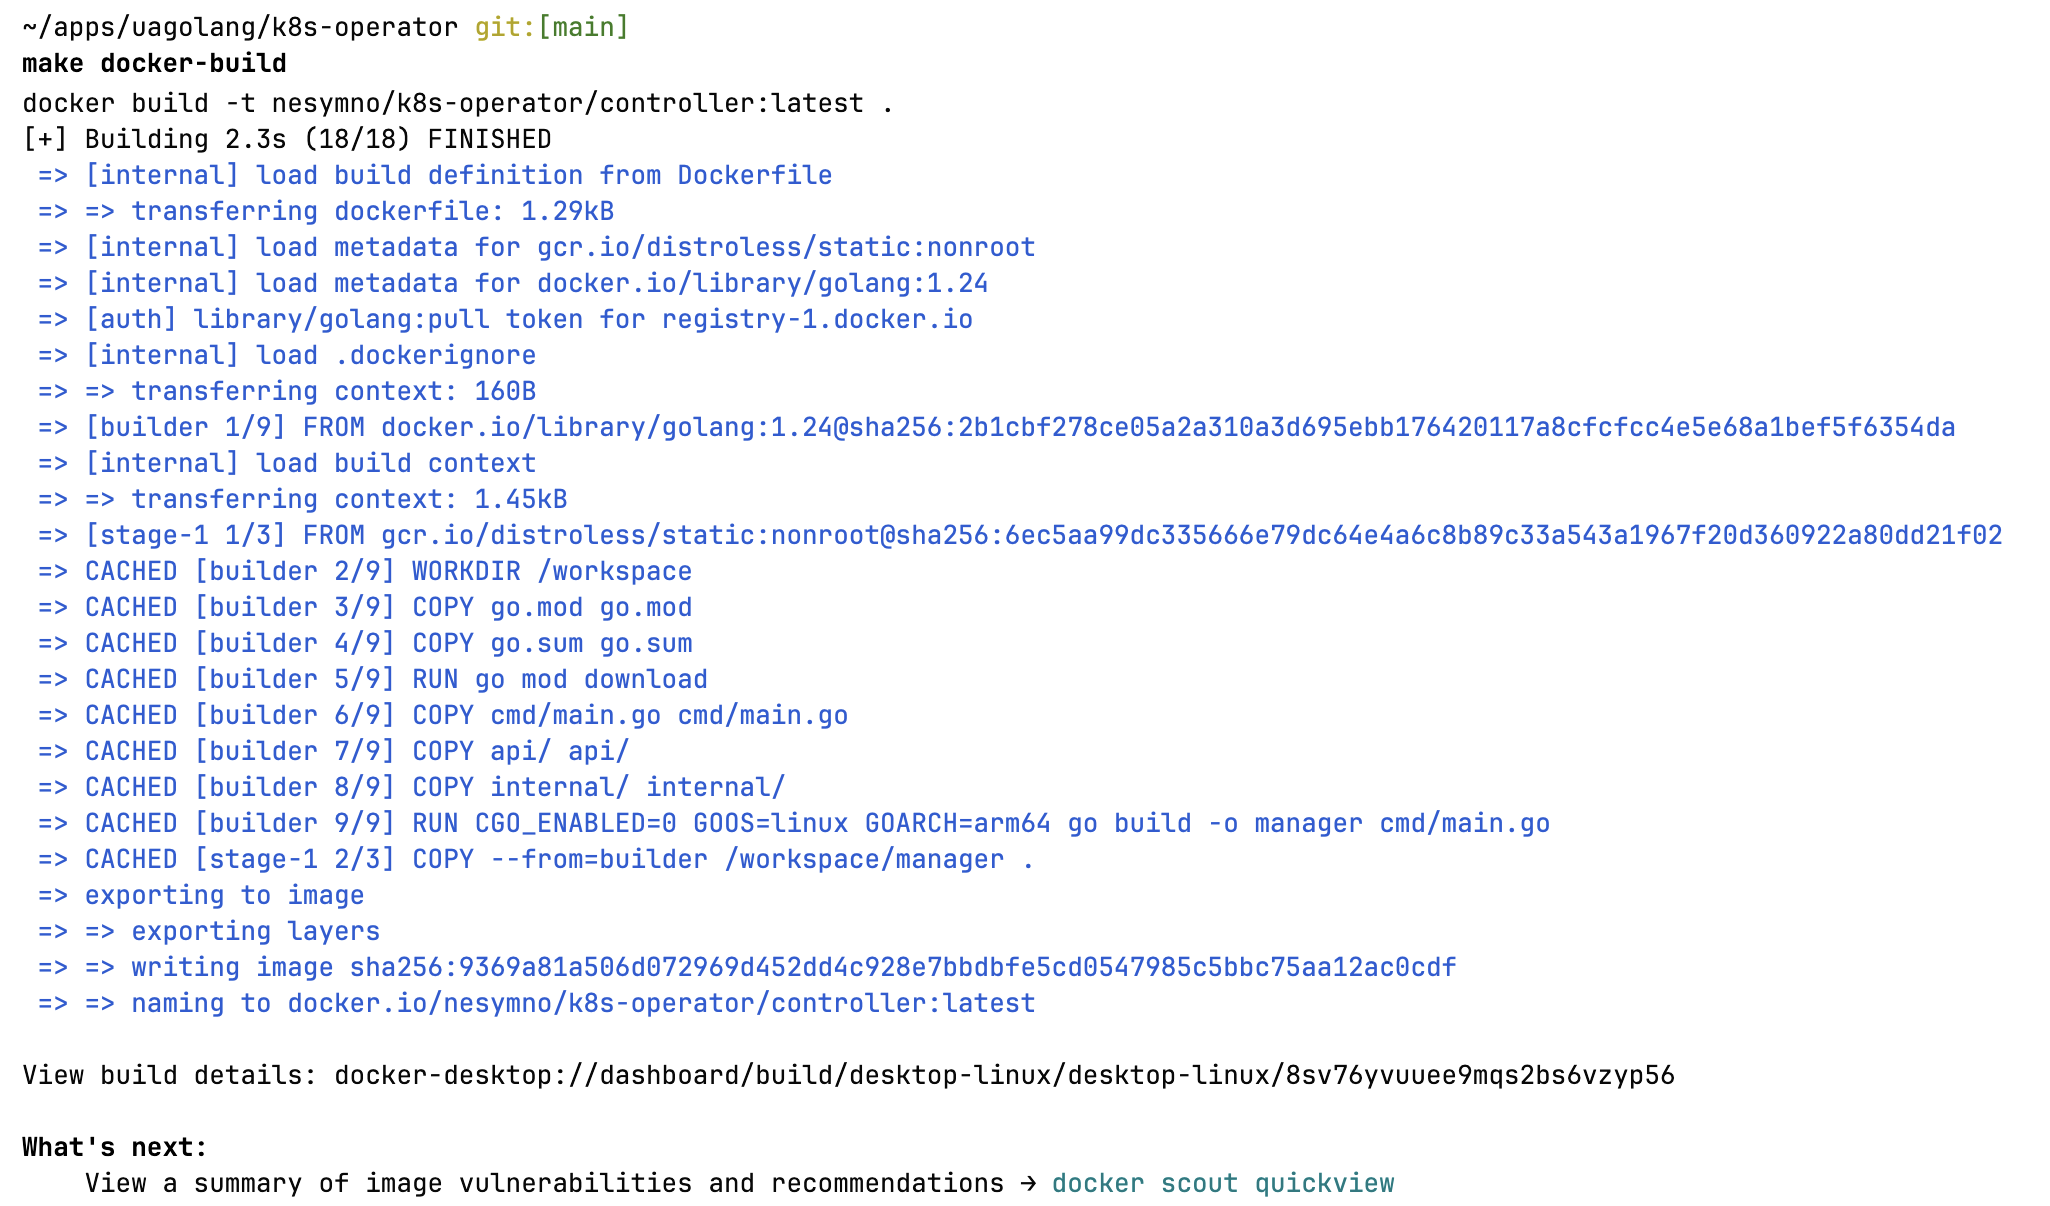
Execution result for make docker-build
Executing make docker-push:
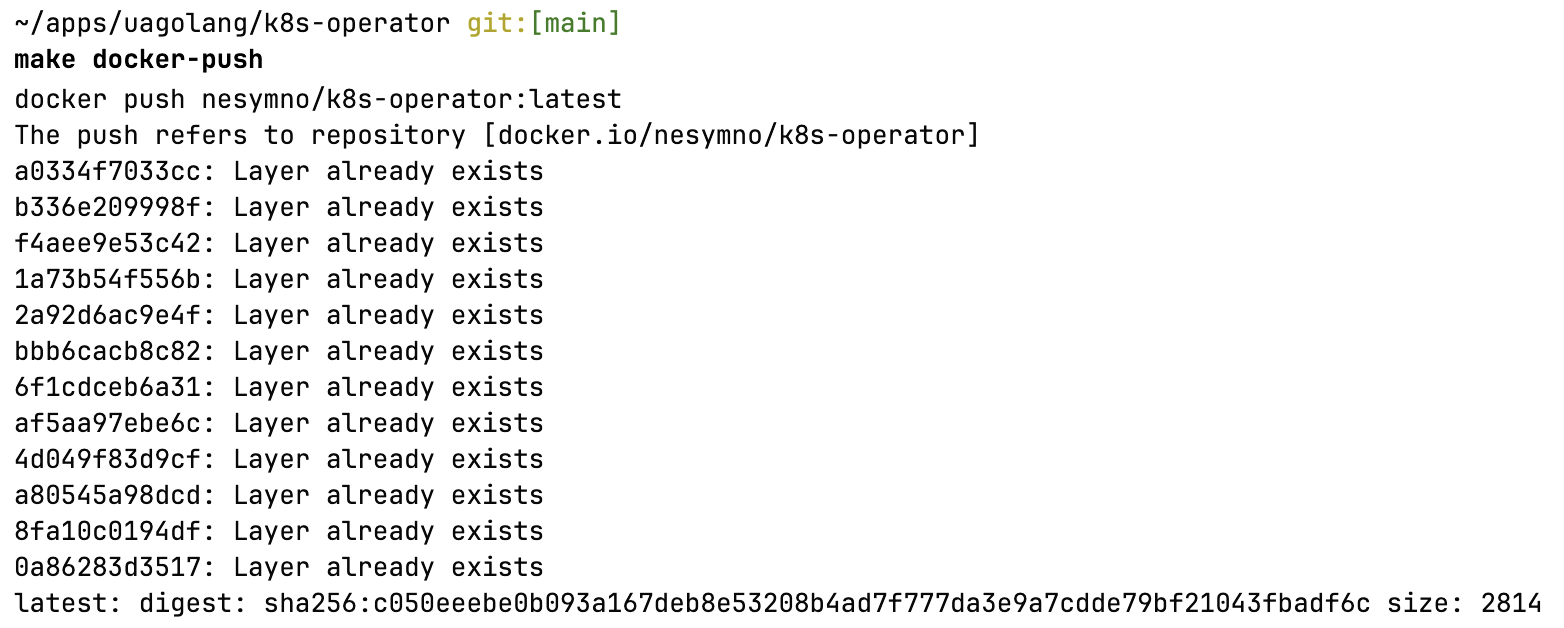
Execution result for make docker-push (image was pushed to Docker Hub)
The make deploy command will load the operator into minikube and start it.
Conclusion
In this article, we've detailed the implementation of an operator for managing Kubernetes resources.
We've seen how to effectively automate the management of complex resources in Kubernetes using operators, utilizing Go and standard development tools from the Kubernetes team. This approach significantly simplifies the process of managing and scaling applications in the cluster. The project code demonstrates the importance of proper architecture, separation of concerns, and creating user-friendly tools for end users.
See you in the next article!